
Achieving a brushed surface finish requires both skill and close attention. This process may appear simple but creating a smooth and even result depends on many aspects. The type of brush as well as how you manage speed & pressure, all have a role in the outcome.
In this blog post we will explain each step of the brushing process. Moreover we’ll describe the main finish types, highlight common applications and outline the main advantages of brushed surface finish.
What Is a Brushing Surface Finish?
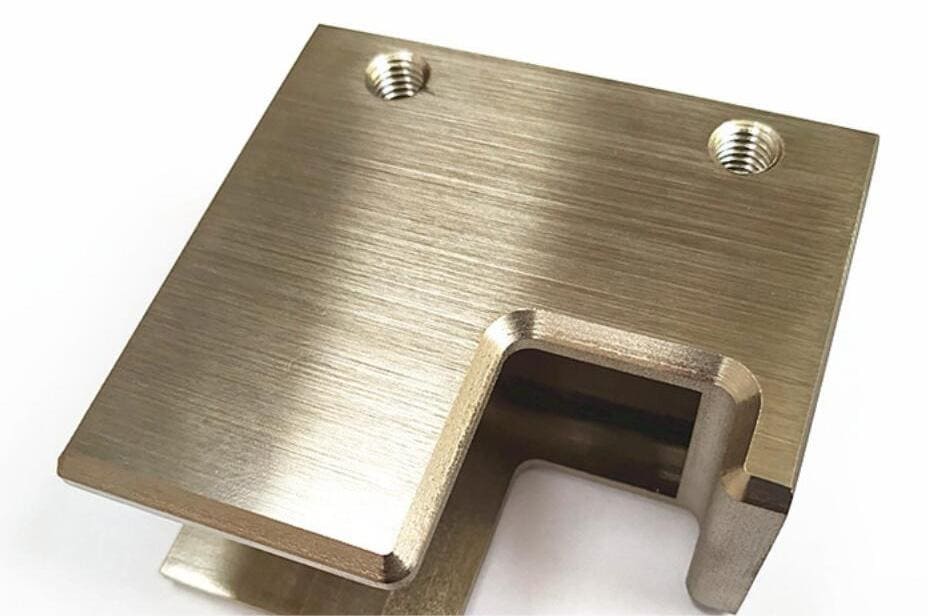
Brushing surface finish is a mechanical method that uses abrasive brushes to add a distinct texture to materials. These brushes move across the surface and leave behind very fine, parallel lines. This creates a consistent, directional grain on the part. Unlike polishing, which removes all lines for a mirror‐like shine, brushing keeps the grain visible.
1. The Directional Grain
These parallel lines form what is called the “directional grain” or lay. This grain serves both cosmetic and functional purposes. It can mask small scratches and fingerprints. Also the direction of the grain can influence how parts fit together, how well they seal and how much friction they produce.
2. Appearance & Gloss
Brushed finishes appear soft and have low gloss which helps reduce glare. In contrast, satin finishes are smoother with a mild sheen and less noticeable texture. Polished surfaces are different; they are completely smooth, highly reflective and show no grain at all.
At ANCASTINGS, we provide inspection reports and Ra values for every finish; this way you know exactly what you’re getting.
Related Blogpost: What is Surface Finish in Manufacturing
Where Brushed Finishes Sit on the Surface Roughness Scale
To see where a brushed finish fits, start by looking at how roughness gets measured. Its two main values are Ra and RMS.
- Ra measures the average height of all tiny peaks and valleys on a surface.
- RMS uses a similar method but responds more to the highest and lowest points.
Most of the time, Ra serves as the standard for measurement. A typical brushed finish, such as a #4 finish, shows an Ra of about 0.8 micrometers. When hygiene is critical, as in dairy or food processing, a smoother finish like #4 Dairy/Sanitary finish is needed. This finish has a lower Ra, mostly between 0.3 µm and 0.4 µm.
Brushed finishes usually fall within a Ra range of 0.2 to 1.0 µm but the exact roughness depends on the process. The abrasive media and the number of passes both affect the outcome. Moreover using a higher grit abrasive leads to finer lines and a smoother surface.
Related Blogpost: A Complete Guide to Surface Roughness
Tools Used to Achieve Brushed Surface Finish
A few reliable tools help create brushed finishes with each tool designed for a particular purpose.
Wire Brushes
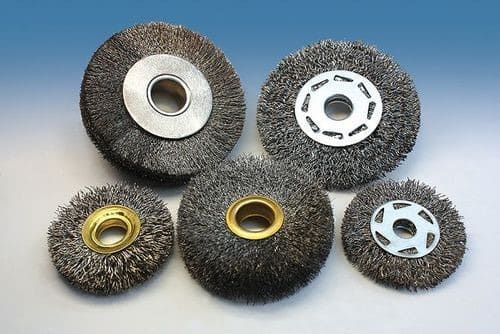
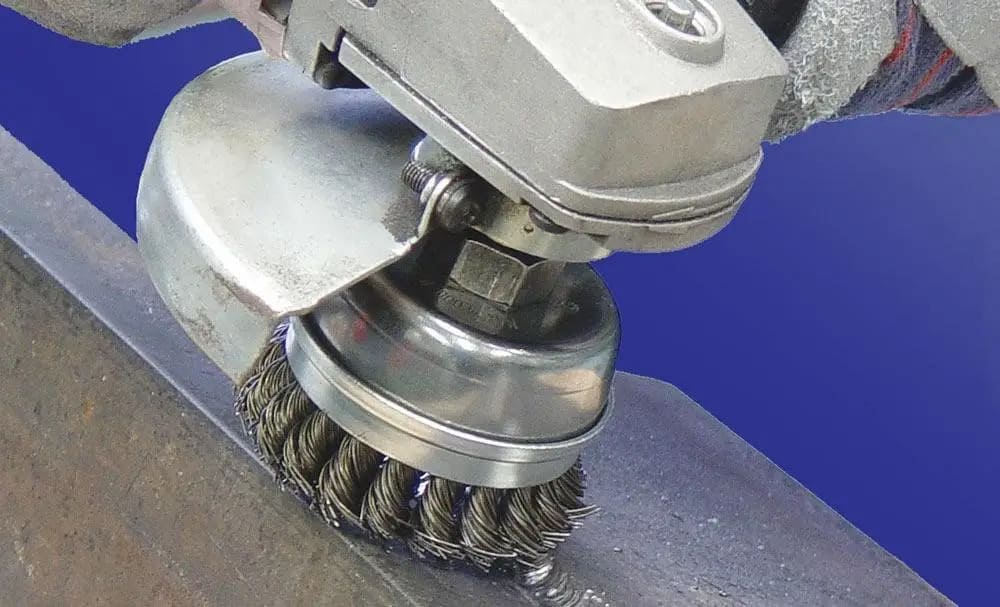
Wire brushes use steel or stainless steel bristles and focus on cleaning surfaces. They remove rust, scale as well as other contaminants but leave most of the base material intact. Therefore they are ideal for preparing surfaces.
Non‐Woven Abrasive Brushes

Non‐woven abrasive brushes are the main choice for producing a classic brushed appearance. Tools like Scotch‐Brite™ wheels use a nylon fiber web filled with abrasive minerals. These brushes come in forms such as convolute or flap wheels. They create even, decorative finishes; plus they stay cool during use and also resist clogging.
Belts & Hand Pads
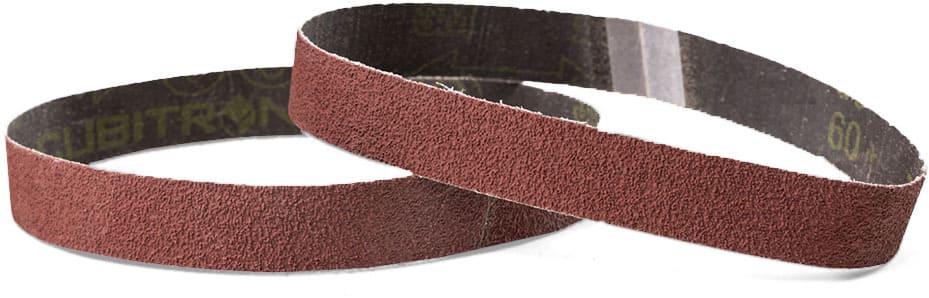
Abrasive belts and hand pads provide flexibility for detailed finishing tasks. They adapt well to surfaces with contours or irregular shapes. This adaptability helps blend areas and create decorative finishes. Operators can also control the process to assure a consistent look. These tools work well for removing marks and for producing a polished, uniform surface.
Process Overview: How to Achieve a Quality Brushed Finish
To get a very good quality brushed finish you should carefully follow the step-by-step process that is given below.
1. Pre‐Brushing Prep
Preparation is the first step toward a flawless finish. Begin by cleaning the metal thoroughly to eliminate dirt, oil and grease. Next, address any deep scratches or flaws to make the surface smooth and even before brushing.
2. Brushing Parameters
Managing certain parameters is necessary for a consistent brushed appearance.
- Speed: Choose slower speeds between 500 and 3,000 SFPM for decorative finishes. Use higher speeds, from 4,500 to 6,500 SFPM, when you need to remove rust or perform heavy deburring.
- Pressure: Apply only light to medium pressure; because too much force can harm both the surface and the brush.
- Pass Strategy: Overlap each pass by 30 to 50% to maintain uniformity. Keep the angle and direction steady throughout the process.
- Cooling/ Loading: Select open‐web brushes. These brushes stay cool during use and resist clogging.
Grain Patterns You Can Create with Brush Finish
Straight/ Linear Grain
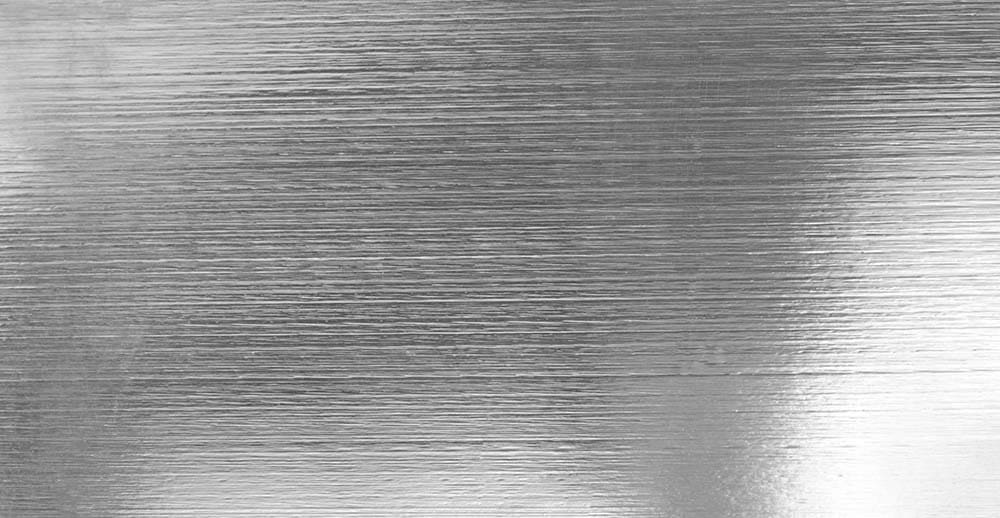
This pattern shows long, straight lines running in a single direction. It is often used for appliance panels and architectural elements.
Circular Grain
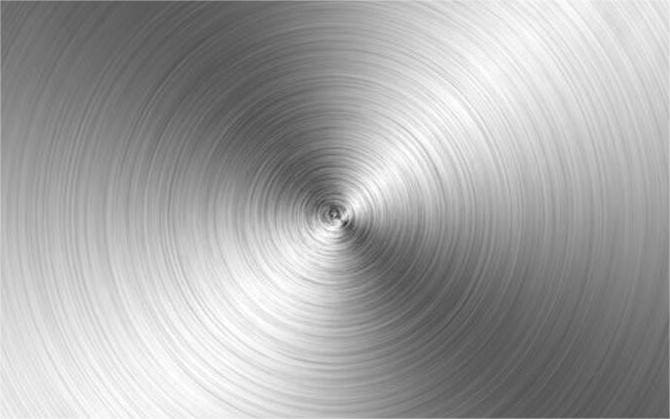
A rotary tool produces this pattern to create a sunburst effect. Many choose it for decorative purposes on knobs, dials as well as watch parts.
Cross‐Brushed

To achieve this texture, brush the surface in two directions, usually at a right angle. This method hides flaws well and gives the surface extra visual depth.
Typical Step‐By‐Step Workflow
- Start by cleaning and preparing the surface completely.
- Select the right brush and adjust the speed to match the finish you want.
- Use steady, straight passes. Keep the pressure even and overlap each stroke.
- Check the grain for evenness and blend any areas if needed.
- Clean the part after brushing to remove residue and add a protective layer if necessary.
Types of Brushing (By Material & Finish Outcome)
Brushing methods differ based on the material, the finish you want and the abrasive grade.
By Material
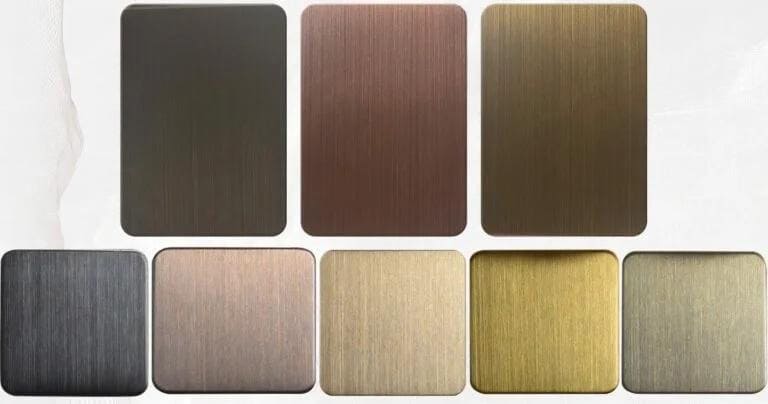
Every metal shows a unique look after brushing.
- Stainless steel gets a smooth, modern finish that works well for appliances.
- Aluminum, being lightweight, displays fine straight lines. This makes it suitable for electronics enclosures.
- Brushing brass results in a warm, matte surface and is often chosen for decorative hardware.
- Nickel turns matte after brushing. This finish is common in luxury fixtures and automotive parts.
By Finish
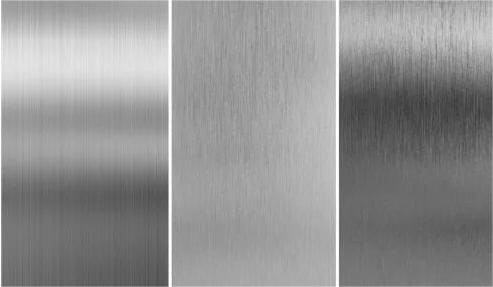
Stainless steel finishes use number system
- A No. 3 finish gives a rough, partly polished look which is often found on kitchen counters.
- The No. 4 “satin” finish is the most popular. It shows fine, straight lines and is used on sinks and elevators.
- A No. 6 finish looks dull and reflects less light. It is made by brushing a No. 4 finish.
By Non‐Woven Grades
Non‐woven abrasives are available in several grades for different effects.
- Coarse grades quickly remove heavy rust and scale.
- Medium grades are best for blending surfaces and doing light deburring.
- Fine and very fine grades are used last. They create a soft, decorative finish and take off very little material.
Applications Where Brushed Surface Finishes Excel
Consumer Goods
Many everyday items use brushed finishes. This surface helps conceal fingerprints and small scratches. As a result, products like watches and decorative pieces stay cleaner and look newer for a longer time.
Automotive/ Interior Trim
Car interiors rely on brushed finishes to create a high‐end appearance. Dashboards, consoles and door handles often feature this look. This finish cuts down on glare from sunlight and gives the interior a modern, luxurious feel.
Appliances & Fixtures
Brushed finishes appear on many kitchen appliances. Refrigerators, sinks as well as ovens often have this non‐reflective, stylish surface. This finish stands up to wear and is simple to clean which suits busy kitchens well.
Electronics Housings
Brushed metal casings are common in premium electronics like laptops and smartphones. This finish adds durability and gives the devices a high quality look and feel.
Fabrication Tasks
Workshops use brushing as an important step for metal parts. This process removes sharp edges for safety and cleans up welds. It also roughens the surface which helps coatings and paint stick better.
Benefits & Tradeoffs of Brushing Surface Finish
Benefits
Brushed finishes provide several important advantages for both appearance & performance.
- Even grain creates a modern, attractive look.
- Brushing can help paint and coatings stick more effectively.
- Texture hides fingerprints, smudges and light wear.
- The process is often an affordable choice to achieve a high‐end finish.
- When applied properly, it cleans and deburrs parts without changing their main dimensions.
Tradeoffs
There are also some drawbacks to brushed finishes that you should consider.
- Grain direction can collect dirt which makes cleaning harder.
- Using too much pressure or heat can leave heat marks or other flaws.
- Some environments may cause the finish to corrode more easily.
- The matte surface reflects less light than polished finishes.
- Achieving a flawless, uniform finish normally needs skilled workers.
Brushed vs Other Surface Finishes
| Attribute | Brushed (No. 4) | Satin (≈ No. 6) | Polished (No. 7/8, mirror) | Bead‐blasted |
| Appearance | Matte look with visible, parallel lines | Soft sheen with finer, less distinct lines | Highly reflective, mirror‐like surface | Frosted, uniform texture with no shine |
| Typical Ra Range | 29 to 40 µin, normally 0.8 µm (32 µin) | About 0.4 µm (16 µin) | Around 0.02 µm (1 µin) | Over 45 µin, varies by blasting |
| Grain Pattern | Linear & directional | Subtle, directional | No visible grain, non‐directional | Random, non‐directional |
| Reflectivity | Low to moderate | Moderate | Very high, mirror finish | Very low, diffuse reflection |
| Fingerprints/ smudges | Grain partially hides marks | Hides marks better than No. 4 | Marks show up easily | Marks are least visible, diffuse |
| Repair/ blendability | Local blending works well | Blends easily because of soft sheen | Repairs stand out, hard to blend | Uniform re‐blasting may be needed |
| Production Method | Abrasive belt grinding | Tampico brushing after No. 4 | Extended buffing & polishing | High pressure bead blasting |
| Cost & processing time | Moderate | Similar to brushed | Highest, requires more labor | Moderate |
| Common uses | Appliances, panels, storefronts | Architectural trim, fixtures | Decorative panels, reflectors | Electronics, paint‐prep surfaces |
If you need help choosing the right finish for your project, Ancastings’ team is available 24/7 to assist you.
Quality Control & Inspection
A reliable brushed finish depends on thorough inspection and well‐defined standards.
Specifying the Finish on Drawings
Drawings should state the finish clearly. Indicate grain direction (lay), roughness (Ra) and waviness using standard symbols. Always include the required Ra value to prevent confusion.
Measuring Roughness
Check the surface’s Ra value with a portable stylus profilometer. This assures the finish meets specifications such as the typical 29 to 40 microinch range for No. 4 finishes.
Visual Standards
Inspect each part visually by comparing it to an approved master sample. Perform this check under controlled lighting conditions. This process keeps the grain angle, density and appearance uniform throughout the production run.
Ancastings can also provide surface data, lay confirmation and full COC/ PPAP documentation if needed.
Common Defects & Solutions for Brushed Surface Finish
Tiger Striping/ Uneven Grain
Inconsistent, wavy lines on the metal surface indicate tiger striping. This defect gives the part a non uniform appearance. Uneven pressure or changes in speed during brushing usually cause it. To correct the problem, keep pressure steady and maintain a constant pace. Make sure to overlap strokes evenly to achieve a smooth, uniform grain.
Smearing/ Heat Tint
Smearing or heat tint shows up as discoloration on the metal. Too much pressure creates excess heat which often leads to this issue. A brush clogged with debris can also cause it. To resolve this, lower the pressure and clean the abrasive media. Moreover switching to an open‐web brush can help avoid clogging and reduce heat buildup.
Over‐Rounding Edges
Over‐rounding happens when the brush removes too much material from the edges during deburring. This can change the part’s specifications. To avoid this, select a less aggressive wheel and shorten the time the brush contacts the edge. For greater control, use unitized wheels that allow for more precise cutting.
Safety & EHS Essentials – Often Overlooked
Following safety guidelines is crucial when brushing surfaces. Remember these important points for safe operation.
- Wear safety goggles or a full face shield to guard against flying debris and broken wires.
- Use gloves, long sleeves as well as dust masks to protect against cuts, burns and inhaling dust.
- Do not exceed the rated RPM or SFPM for any brush; always check the manufacturer’s limits.
- Keep machine guards in place and use local dust collection to manage dust or sparks.
- Select open‐web brushes to limit heat buildup—particularly when working on thin parts.
Cost & Throughput Tips for Brushing Surface Finish
You can boost brushing efficiency and cut costs with a few straightforward changes.
- Select abrasive media and grit that let you finish the job in fewer passes.
- Adjust the speed to fit the work. Use 500 to 3,000 SFPM for decorative finishes. For aggressive blending, set the speed between 6,000 and 8,000 SFPM.
- Keep your pressure light & steady. This approach prevents early tool wear and protects the surface.
- Use automation for high volume jobs; because automated brushing increases consistency, speeds‐up output and also lowers labor costs.
Quick Selection Guide
Use this guide to pick the best method for common brushing tasks.
Goal→ Appliance‐Grade Straight Grain on 304 SS Panel

To get the classic appliance finish, pick a fine‐grade, non‐woven finishing wheel. Set your speed between 1,500 and 2,500 SFPM. Apply light & consistent pressure. Your aim should be a surface roughness of (Ra) near 0.8 µm because it matches a standard No. 4 finish.
Goal→ Post‐Weld Blend On Stainless Tube

For blending welds on stainless tubing, use a combination deburr/ finish flap brush. Start at a higher speed, around 5,000 to 6,000 SFPM, to blend the weld quickly. After the first pass, lower the speed to the decorative range. This step helps match the grain pattern across the tube.
Goal→ Circular Grain on a Knob
To make a clean “sunburst” effect on a knob, choose a rotary brush. Run the tool at a moderate speed. Use an indexing fixture or a turntable to rotate the part accurately. This method creates a neat, concentric grain on the surface.
To Sum Up
A brushed finish offers both visual appeal and practical benefits. It delivers a modern appearance while concealing small signs of use. To get uniform, high quality results for any project, you must choose the right brush and apply the correct techniques.
Ancastings stands out as the top choice if you want precision CNC parts with professional brushing and surface finishing. Feel free to reach out to us at any time.
Yes. When cleaned properly, the hygienic surface created by brushing works well for food and medical equipment. Industries often use a No. 4 finish as a standard in these cases.
The ideal speed depends on both the material and the desired outcome. Decorative finishes usually require 500 to 3,000 SFPM while deburring may need up to 6,500 SFPM. Use this formula to find SFPM: SFPM = RPM * 0.262 * Tool Diameter (in)
If performed correctly, brushing keeps dimensional changes to a minimum or eliminates them. This makes it preferable to more aggressive finishing processes.
Choose a metal finishing shop with experienced staff and advanced machinery for the best results. For dependable and integrated solutions, ANCASTINGS offers expert CNC machining and brushing, guaranteeing precise and consistent quality for your components.