
Connector pins may look small but they are essential for reliable electrical connections. Production of these pins involves more than just shaping metal. This process demands accuracy, careful material selection and thorough inspections at every stage.
In this blog post we will cover every step of machining connector pins. It will start from initial planning and will end at final quality checks.
What Are Connector Pins?
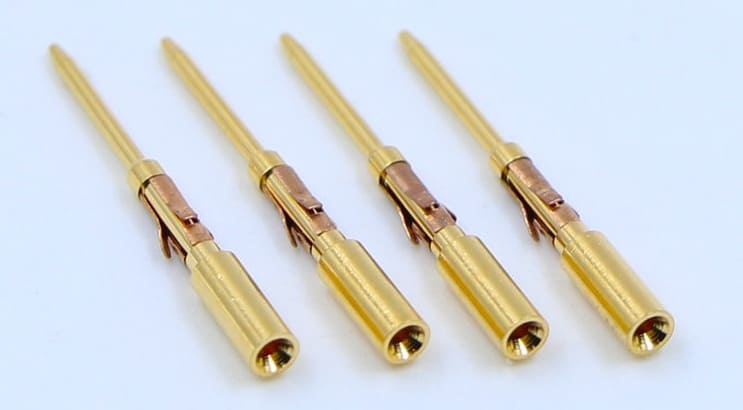
Connector pins are tiny metal contacts present in electrical connectors. They provide a dependable route for data signals or power to move between components or circuits.
While stamping is usually used to produce these pins in bulk, CNC machining is chosen for applications that need high precision.
Step-by-Step Machining Workflow for Connector Pins
Connector pins’ manufacturing follows a step by step process. This assures every pin meets performance and quality standards.
1. Design & Engineering Phase
Planning comes first. Preparation at this stage is key to a smooth process.
Specification
Engineers define the pin’s requirements. They specify the shape, dimensions as well as tolerance. The surface finish is also determined here.
CAD Modeling & Simulation
Designers use CAD tools like SolidWorks or AutoCAD to build a 3D model. This checks that the pin fits the housing and other parts correctly.
We often give DFM feedback at this point to help clients save on manufacturing costs.
Material Selection
Next is selecting a material that matches the design. Brass is preferred for conductivity; on the other hand, stainless steel is good for corrosion resistance and strength.
2. Setup & Machining Operations
Once the design is complete, manufacturing can start. This stage includes material preparation and using machines to shape the connector pins.
Raw Material Preparation & Sourcing
Manufacturing phase begins by sourcing the material. Manufacturers normally receive it as long rods. These rods are then cut into shorter pieces to match the lengths for machining.
CNC Machining Steps
Swiss‐type CNC lathes do the shaping. They use multiple processes like milling, turning and drilling.
- The main cylindrical body is formed by CNC turning which rotates the stock during shaping.
- Milling comes next and adds features like flats, grooves or keying slots.
- CNC drilling is the final step and creates any necessary undercuts or contact holes.
Typical Tolerance
CNC machining can reach very tight tolerances often as strict as ±0.01 mm. This assures every pin meets the particular design requirements.
3. Secondary Operations & Finishing
After machining, pins need finishing before they can be used in connectors.
Cleaning, Deburring & Surface Treatment
Machined pins have small and sharp burrs. Deburring removes these flaws. Each batch takes 2 to 5 minutes.
Cleaning follows deburring to remove any oils or debris left from machining.
At ANCASTINGS, we use both ultrasonic and mechanical methods to assure every batch is burr free. This results in fewer rejects and faster shipping.
Plating/ Coating
Next is plating. Pins receive a thin layer of silver, gold or nickel. This coating adds corrosion resistance and improves electrical conductivity.
Inspection and Quality Control
Every batch is inspected at the end. Technicians check dimensions with micrometers and CMMs. Additional tests for contact resistance and mating are also performed. Only perfect pins move forward for use.
Typical Materials for Connector Pins
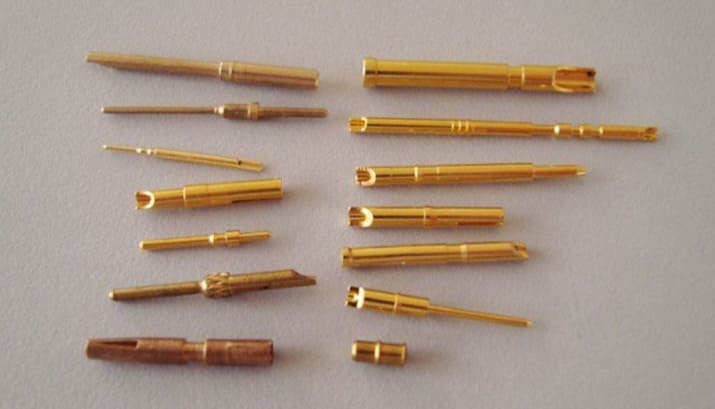
Manufacturers choose specific materials for connector pins to assure reliable operation. The material chosen affects the pin’s strength, durability as well as its lifespan.
Conductive Metals
The base of a connector pin is normally made from a conductive metal. This lets electricity flow through the pin with minimal resistance.
- Copper Alloys: Copper and its alloys are very popular. They balance strength, conductivity and cost.
- Brass: Brass is a common and affordable material for pins. It provides good electrical conductivity for most general use.
- Phosphor Bronze: Phosphor bronze is tougher and more durable as compared to brass. Its spring‐like properties make it good for connectors that get used a lot.
Coating/ Plating
Manufacturers mostly apply a thin metal coating to the pin’s surface. This layer improves conductivity and protects the pin from wear and corrosion.
- Nickel: Nickel plating is hard and corrosion resistant. It’s mostly used as a base for other coatings like tin or gold.
- Tin: Tin is an economical coating that provides good protection. It makes soldering easier and prevents corrosion.
- Gold: Gold layer is top of the line with extraordinary conductivity. It doesn’t corrode so it’s good for critical high reliability connections.
- Silver: Silver has the highest electrical conductivity of all metals. It’s used when signal transfer is critical.
Design‐for‐Manufacture & Machining Best Practices
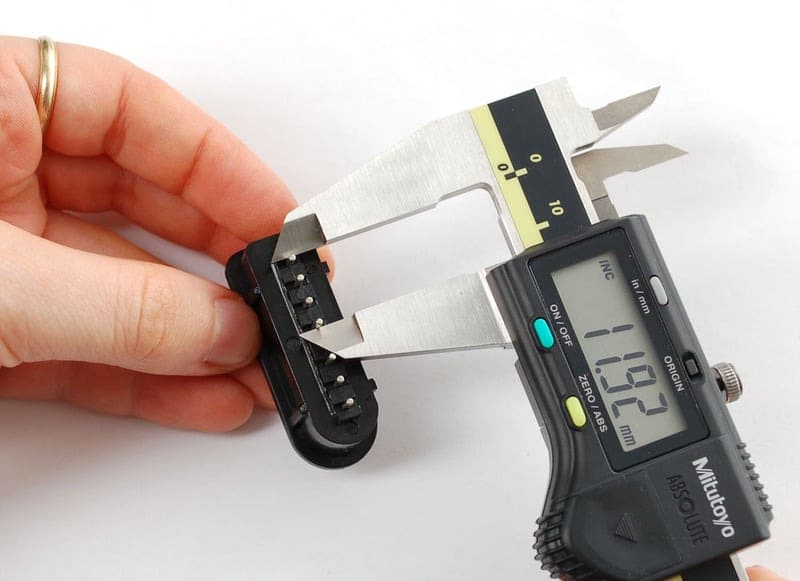
You should plan for manufacturing from the very start to save time & money. Apply these best practices during design to make machining easier and affordable.
1. Designing Pins for Machinability
Choose simple shapes that can be machined easily. Avoid adding features that are too small or complex. Set tolerances that are practical. Making them too tight will increase production cost. Also, plan how to hold the pin during machining. This will help maintain accuracy.
2. Material & Surface Finish Recommendations
The material you choose will affect how the part is made. Use brass which is easier to machine to save cost. Specify a smooth surface finish. This will let pins insert reliably and reduce wear over time.
3. Tolerances & Alignment with the Connector Housing
Add tolerances to your design for proper alignment with connector housings. Add requirements for flatness and concentricity for a smooth fit. These details affect long term reliability & assembly force.
Ancastings’ engineer can review your design and recommend where to relax tolerances to save time and money.
4. Cost & Volume Trade‐Offs
Match your design to the production volume. Use CNC machining for small runs or high precision. For larger quantities use more affordable methods like casting. This will affect production speed, tooling cost and cost per unit.
Connector Pin Machining Issues & How to Prevent Them
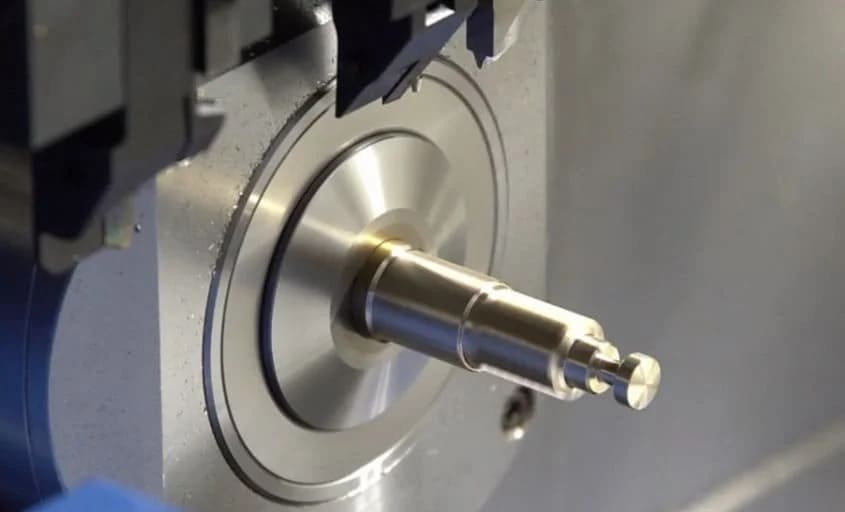
Machined connector pins need to be precise. Very small mistakes can cause downtime or even part failure. Below, we’ll go over some common problems, what causes them and most importantly, how to avoid them in the first place.
Burr Problems & Sharp Edges
- Issue: burr can actually cause issues like mated connectors to not fit properly, or even damage other parts.
- Reasons: Failed to deburr properly, using tools that are worn out or using feed rates that are too high.
- The Solution:
- Use deburring – both mechanical & ultrasonic in multiple passes, just to be safe.
- Make sure you’re using sharp tools and setting your cutting parameters with care.
- Set up automated deburring stations so its consistent every time.
Dimensional Issues & Tolerance Stack‐Up
- Issue: Pins aren’t fitting into housings as they should, mated incorrectly or losing contact sometimes.
- Reasons: Mainly its due to thermal expansion, worn-out tools, poor fixture clamping or machine vibration.
- The Solution
- Use CMMs to check the dimensions on the fly.
- Make sure you replace your cutting tools regularly and on schedule.
- Use hydraulic or shrink‐fit chucks – they’re a lot stronger than the standard clamps.
- Try simulating thermal compensation in your CAM software.
Poor Plating Adhesion or Coating Issues
- Issue: Plating has flaked off or you’re experiencing corrosion issues and uneven conductivity
- Reasons: Failed to prepare the surfaces properly, contamination from oils/ oxides or maybe using the wrong plating current.
- The Solution
- Before you even start plating, make sure you’ve got your surfaces clean, using ultrasonic baths and acid dips to get the job done.
- Keep a close eye on your plating bath temperature and chemistry
- Test the adhesion by doing a tape test or thermal cycling.
- Use nickel as an undercoating before gold plating for better bonding.
Connector Pin Alignment Issues
- Issue: Misaligned pins make mating hard which can cause open circuits or damage connectors.
- Reasons: Fixtures aren’t being used well, machining forces are uneven or concentricity is poor.
- The Solution
- Use v‐blocks and dowel pin‐aligned fixtures to keep everything in line.
- Try to plan your machining passes so they’re symmetrical. It can help balance the forces.
- Check your concentricity with a laser system or an optical comparator if you can.
Insertion Force that’s Too High or Poor Retention
- Issue: Too much force is stressing the mated parts, wearing out the operators or shortening the lifespan.
- Reasons: Surface is too rough, the diameter tolerance is off or the pins got deformed during handling.
- The Solution
- Aim for a surface roughness of below 0.4 micrometers Ra. It makes mating a lot easier.
- Get in the habit of using go/ no‐go plug gauges during production runs.
- Store and move pins in trays that can resist static & vibration. This can make a big difference.
Material Defects or Using the Wrong Material
- Issue: You may see bending, cracks, low conductivity or fatigue failure in connector pins.
- Reasons: Often these problems come up because people used the wrong alloy, bought from suppliers that are inconsistent or had internal voids in the material.
- The Solution
- Make sure the raw material you’re using comes with material test reports (MTRs) attached.
- Do some ultrasonic testing (UT) or eddy current inspection to check for any hidden flaws.
- Choose an alloy that’s right for the application. For example if you need corrosion resistance, go for brass. If you need to make spring contacts, phosphor bronze is the better option.
Why Choose Machining Over Stamping for Connector Pins?
When you’re producing connector pins, you’ve got two options – machining and stamping. Here we will see the difference between both:
| Feature | Machining | Stamping |
| Precision | Very High (±0.01 mm) | Lower |
| Complexity | Handles Complex Parts | Best for Simple Shapes |
| Best Volume | Low to Medium | High Volume |
| Tooling Cost | Low | High initial cost for custom dies |
If your pins need to be super precise or have a very complicated shape, then machining is your best method. Plus, machining lets you skip the cost of custom tooling. Therefore it’s actually a smart choice for prototypes or small production runs.
Machined Connector Pins: Types & Applications
Machined connector pins have different varieties and each one is designed for a particular task. It’s better to know beforehand what you’re looking for as it will help you pick the right one for your electronics project.
Turned Pins (Lathe‐Machined)
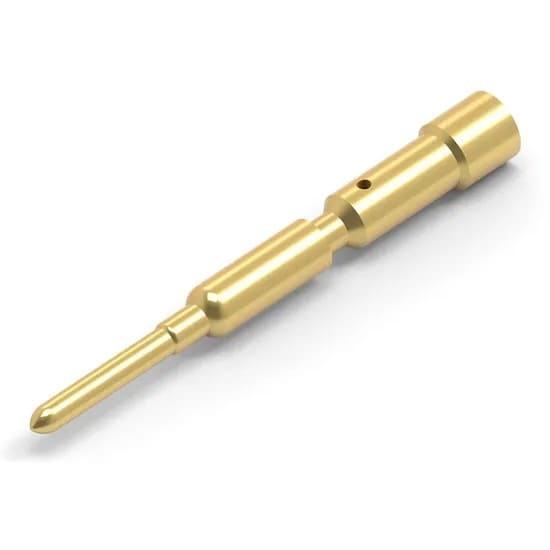
These cylindrical pins are made from round metal stock on a CNC lathe. Often, the manufacturer will add some extra features like chamfers, shoulders or tips to help the pin fit just right.
- Uses
- Military and aerospace gear that needs to be super reliable.
- Medical electronics where durability is a must.
- Connections that are going to be mated and unmated a lot.
- Benefits
- They keep their concentricity and hold tight tolerances down to ±0.01 mm.
- They can handle a lot of current and mechanical stress.
- They stay consistent in their performance because of high precision.
Press‐Fit Pins

Press‐fit pins are slightly bigger than the hole they go into. Therefore when you press them into a plated‐through hole in a PCB, they make a tight connection without any solder.
- Uses
- Automotive control units & telecom devices.
- Products where soldering isn’t an option.
- Applications with lots of vibration.
- Why they’re so useful
- No soldering to worry about which makes assembly a lot easier.
- Make a strong mechanical connection.
- Way more resistant toward shock and vibration than solder joints.
Crimp‐Type Machined Pins

These pins have a hollow, barrel‐shaped end that lets you squeeze them onto a wire to make a super secure connection.
- When to use them
- Mostly used in wire harnesses in airplanes and cars.
- A lot in Industrial control systems & robotics.
- Different types of cable assemblies.
- Why they’re the best choice
- Connect to the wire securely and keep out moisture.
- Automated assembly lines can make them fast.
- Can even be reused.
Solder‐Type Machined Pins

These pins are made for attaching directly to PCBs. Some have flats or holes to help the solder flow and make a solid connection.
- Uses
- Used in through‐hole and surface‐mount PCBs.
- In industrial sensors and embedded computers.
- Used to connect parts in consumer electronics
- Benefits
- Keep the electrical connection stable and strong.
- Lasts a long time and performs consistently.
- Even gold or tin plating can keep them corrosion‐free.
Custom‐Machined Pins – A Specialty Solution
Custom pins are created to fulfill very specific purposes. Manufacturers can customize them with slots, keys or threads to meet the unique needs of every application.
- Where They’re Used
- Aerospace and defense connectors are often built with custom‐made pins.
- Hybrid parts that need to work both electrically and mechanically also use custom pins.
- And those devices that need a very precise locking or alignment also depend on these custom‐made pins.
- Benefits
- Unique and tough design challenges can be solved using custom‐made pins.
- They help improve the orientation & retention of parts.
- Features like sealing or locking that are special to the application become possible.
Quality Control & Inspection of Custom Machined Connector Pins
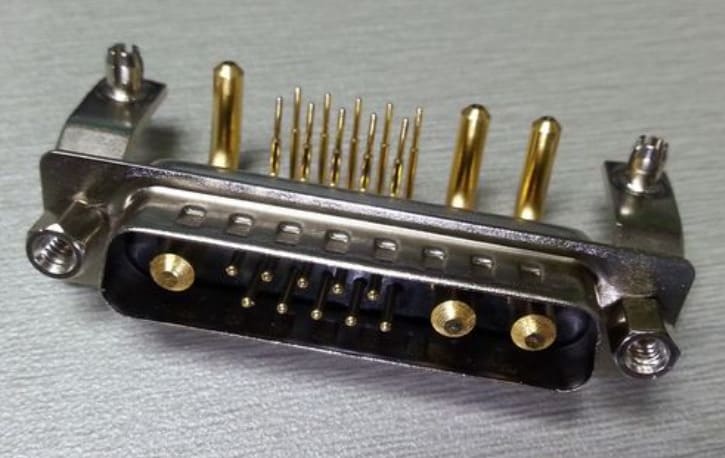
Before any machined connector pin is released, a thorough quality control process needs to be carried out to make sure it meets high standards.
Key Quality Standards to Check
There are a number of critical metrics that need to be checked during quality control to make sure each and every pin is up to the mark.
- Dimensional Tolerances: Check that the pin’s size & shape are exactly as needed.
- Surface Finish (Ra): Assure the pin is smooth enough so as to avoid wear over time.
- Circularity & Flatness: Assure the pin is perfectly round and the surfaces are even.
- Coating Thickness: Confirm that protective layers, such as gold, are just the right thickness.
- Contact Resistance: Check that electricity passes through with minimal resistance.
- Current Rating: Check your pin can handle the required electrical load.
- Insertion & Mating Forces: Calculate how much force is needed to connect and disconnect the pin.
- Retention Strength: Perform tests to check how securely the pin stays in place.
Inspection Tools & Methods Used
Accurate measurement of these tiny features requires some particular tools.
- For the basics, calipers, micrometers and optical microscopes can work.
- For complex dimensions, coordinate measuring machines (CMMs) are used as they are known for their high accuracy.
- Automated vision systems let you inspect many pins in no time for any defects such as incorrect position or height.
- Statistical Process Control (SPC) helps keep the manufacturing process consistent and on track.
Proving Quality Through Documentation
Just getting good results isn’t enough. We need to prove quality.
You should document everything – all the materials, process steps and inspection results for each batch. This is how trust is built. Moreover it shows that every pin meets the required standards.
Ancastings’ Custom Connector Pin Machining Services
Ancastings provides custom connector pin machining services. Using advanced Swiss CNC lathes we make high‐precision pins from materials such as copper, brass and stainless steel. We deliver custom pins with tolerances as tight as ±0.01 mm. That level of accuracy means your critical applications will stay reliable.
To Sum Up
Reliable electronic connections depend on machined connector pins which provide excellent durability and accuracy. Choosing the right quality process, material and design leads to high performance connections.
Machining is the best option for projects that require strict tolerances and custom shapes. Reach out to Ancastings for precise CNC machining services for your custom connector pins. You can contact us at any time.
Machined pins are solid rods that are machined with high precision which enables tight alignment and gives them strength. Rolled pins on the other hand, are hollow tubes with a slot in them. They compress and flex to fit inside the hole.
Yes. Their precise shape and smooth surface help manage impedance. This control is important for maintaining signal quality in high frequency applications.
The cost depends on the material selected, the complexity of the pin and the order quantity. For custom, high precision pins, the cost per pin can be as low as a few cents or as high as a few dollars.
Most standard custom orders take 2‐4 weeks to get done. If things are more complicated or you only want a small batch, it can take up to 5 to 7 weeks.