
Face milling is a widely used process in precision machining to create intricate contours and high-quality finishes on parts. This method plays a critical role in industries ranging from aerospace to automotive due to its specialized cutters and precise techniques. As such, this guide delves into the face milling process, covering its working principles, cutter types, operational strategies, and more. Whether you are exploring the differences between face milling and other processes like end milling or peripheral milling, this comprehensive article provides actionable insights to enhance your understanding of face milling.
What Is Face Milling?
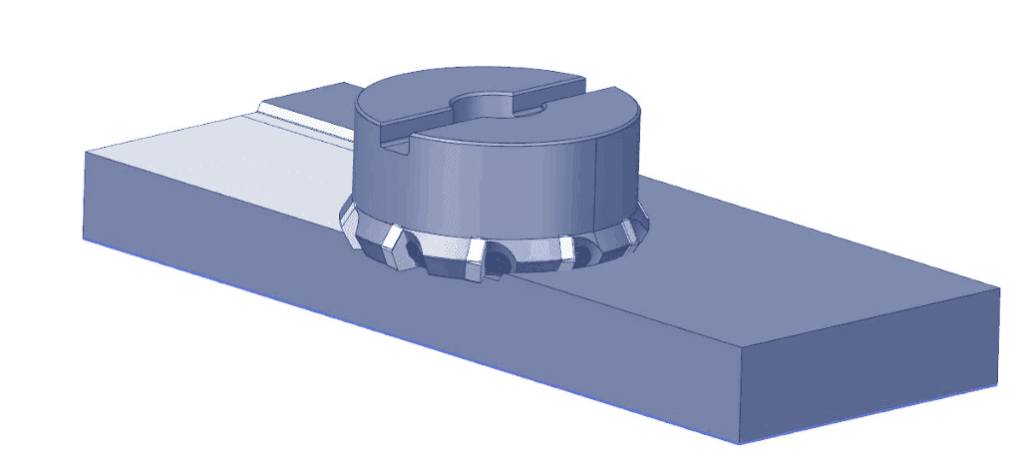
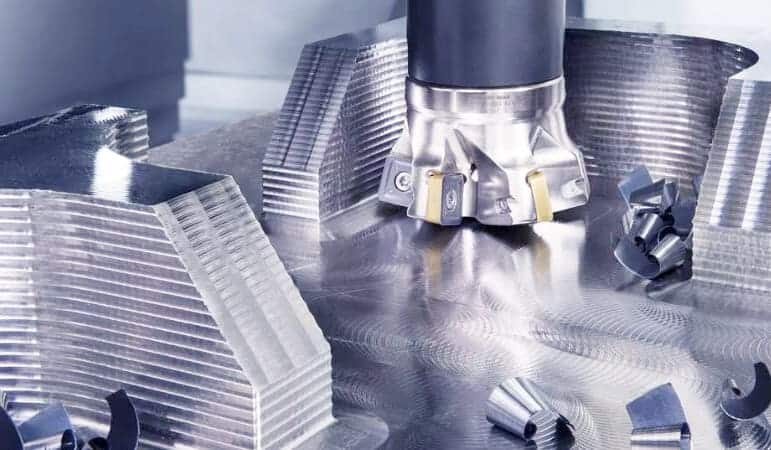
Face milling involves positioning a milling machine or machining center perpendicularly to the component, allowing the top of the cutter to execute the milling action. This technique is essential for creating a flat surface, often serving as a reference point in CNC machining. It can be performed using a variety of tools, including shell mills, end mills, and fly cutters. The advantages of this method include high efficiency, rapid material removal, and the ability to deliver medium-quality surface finishes. Moreover, face milling provides precise control over surface flatness and smoothness, making it an extensively adopted technique in the field of mechanical machining.
How Does Face Milling Work?
This technique involves a combination of precise tool setup and controlled cutting motion to achieve efficient material removal and superior surface quality. Let’s break down the process step by step.
Tool Setup
To begin face milling, operators first set up the tool and workpiece properly. They mount a face milling cutter, typically equipped with indexable inserts or carbide teeth, onto a spindle, aligning its axis perpendicular to the workpiece surface. They then securely fix the workpiece to the machine table, either manually or using CNC automation, to ensure stability during machining. This setup is critical because it helps achieve precision and prevents vibrations that could compromise the surface finish.
Cutting Motion
Once the setup is complete, the cutter starts rotating at high speed while the workpiece or cutter moves linearly along the X, Y, or Z axes in a controlled feed motion. The cutting edges of the tool engage the workpiece surface, removing material in layers. The outermost teeth of the cutter perform the primary cutting, while the inner teeth refine the surface to achieve the desired finish. This combination of rotational and linear motion ensures efficient material removal and creates a smooth surface.
Material Removal
Operators carefully control the depth of cut and width of the cut to determine the amount of material removed per pass. For roughing operations, they use deeper cuts to remove large amounts of material quickly. For finishing, they switch to shallow cuts with higher precision to ensure a smooth surface finish. Additionally, they choose the depth and width based on the material properties, tool capabilities, and the desired outcome of the machining process.
Types of Face Milling Cutters
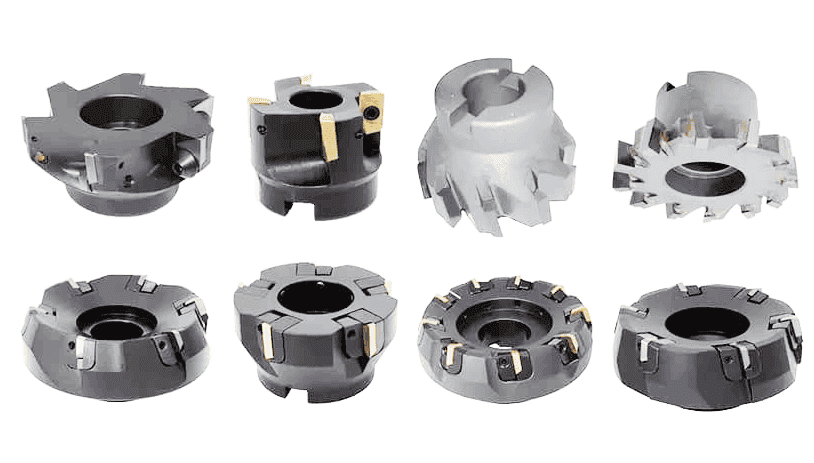
Face milling cutters are designed for specific machining tasks, materials, and surface finish requirements. Below are the most common types:
1. Standard Face Mills
Standard face mills are versatile tools with multiple replaceable inserts arranged around a central body. They are perfect for general-purpose face milling on materials like steel, aluminum, and cast iron. The inserts are typically made of carbide or ceramic and can be rotated or replaced when worn, reducing downtime. These cutters balance cost and efficiency, making them a staple in workshops for roughing and semi-finishing operations.
2. High-Feed Mills
High-feed mills feature small-diameter inserts with large rake angles, allowing them to operate at extremely high feed rates. Their design minimizes radial forces, reducing vibration and enabling aggressive material removal in applications like die or mold machining. Furthermore, they excel in shallow-depth cuts and are particularly effective for machining titanium.
3. Square Shoulder Mills
Square shoulder mills combine face milling and side milling capabilities, producing sharp 90° corners between machined surfaces. They use square or rectangular inserts with reinforced edges to handle heavy axial and radial loads. These cutters are ideal for milling shoulders, pockets, or slots in materials like stainless steel or high-temperature alloys.
4. Round Insert Cutters
Round insert cutters use circular or button-shaped inserts that distribute cutting forces evenly, improving tool life and surface finish. Their geometry allows for higher feed rates and smoother chip evacuation. As a result, these cutters are suitable for continuous cutting in tough materials like cast iron.
5. Shell Mills
Shell mills are large-diameter cutters with a hollow center, which is up to 300 mm or more. They are designed for machining wide, flat surfaces in a single pass. Commonly, they are mounted on horizontal milling machines and used in automotive or aerospace industries for machining engine blocks, frames, or large molds.
6. Indexable End Mills
These mills function as both face mills and end mills, with cutting edges on the face and periphery. They are compact and ideal for smaller workpieces or confined spaces, offering flexibility for face milling, slotting, and contouring. Their replaceable inserts reduce tooling costs for complex geometries.
7. Anti-Vibration Cutters
Anti-vibration cutters incorporate damping technologies to reduce chatter during machining. They are designed for long overhangs or thin-walled components prone to vibration. These cutters improve surface finish accuracy in finishing operations on aluminum, composites, or other lightweight materials.
8. Specialized Cutters
- Titanium-Specific Cutters: Feature sharp edges and specialized coatings, like TiAlN, to handle titanium’s low thermal conductivity.
- PCD Cutters: Use polycrystalline diamond inserts for machining abrasive non-ferrous materials like silicon aluminum or carbon fiber.
- Corner Radius Cutters: Rounded edges reduce stress concentration, and fit for high-speed finishing in molds or dies.
Types of Face Milling Operations
Different types of face milling operations are employed depending on the desired outcome and workpiece requirements. Below, we explore the most common operations and their unique characteristics.
1. Conventional Face Milling
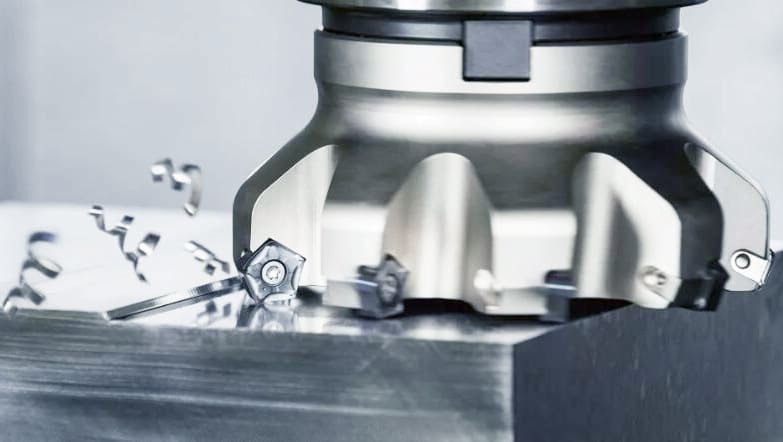
Conventional face milling is the most widely used operation, where the cutter rotates perpendicular to the workpiece surface. The outer teeth of the cutter perform the primary cutting, while the inner teeth refine the surface. This method is ideal for producing flat surfaces on large components, such as engine blocks or machine frames.
2. High-Efficiency Milling
High-efficiency milling focuses on maximizing material removal rates (MRR) while maintaining acceptable surface finishes. This technique employs specialized tools like high-feed mills or round insert cutters to achieve aggressive cutting depths and rapid feed rates. Particularly, it is effective for roughing operations on materials like steel and cast iron.
3. Finish Milling
Finish milling is aimed at achieving high-quality surface finishes and tight tolerances. This operation uses fine-pitch cutters with sharp, polished inserts to minimize tool marks and vibrations. It is typically performed after roughing to achieve surface finishes of Ra < 0.8 μm. Applications include machining molds, dies, and precision components where surface quality is paramount.
4. Contour Milling
Contour milling involves machining complex shapes or profiles on the workpiece surface. The cutter follows a predefined path to create curves, angles, or intricate patterns. This operation is commonly used in industries like aerospace and automotive for machining turbine blades, impellers, and other contoured parts.
5. Slot Milling
Slot milling is used to create slots or grooves on the workpiece surface. The cutter moves linearly along the workpiece, removing material to form the desired slot geometry. This operation requires tools with strong inserts and high rigidity to handle the cutting forces involved. It is commonly used in machining keyways, channels, or T-slots in components like gears or fixtures.
Tips for Choosing the Right Tool
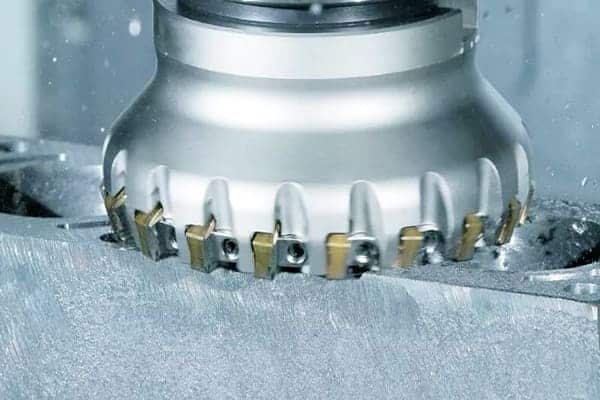
Selecting the right face milling tool is critical to achieving optimal machining performance. The right tool not only improves efficiency but also extends tool life and ensures superior surface finishes. Below are key considerations to guide your selection process.
1. Match the Tool to the Workpiece Material
The material you’re machining plays a significant role in determining the right tool. For hard materials like titanium or stainless steel, opt for cutters with sharp, heat-resistant inserts and high shear angles to reduce cutting forces. For soft materials like aluminum or plastics, choose tools with high rake angles and polished flutes to prevent chip adhesion. If you’re working with abrasive materials like composites or cast iron, prioritize diamond-coated tools or ceramic inserts for extended tool life.
2. Consider the Machining Stage
The stage of machining—whether roughing or finishing—also influences tool selection. For roughing, focus on tools with coarse-pitch inserts and high chip capacity, such as high-feed mills, to maximize material removal rates. For finishing, use fine-pitch cutters with sharp, polished edges to achieve smooth surface finishes (Ra < 0.8 μm).
3. Optimize Cutter Diameter
The diameter of the cutter should match the size of your workpiece and the machining requirements. For small workpieces, choose smaller diameters (50–80% of the workpiece width) to avoid overhangs and vibration. For large surface areas, use shell mills or large-diameter face mills (e.g., 150–300 mm) for single-pass efficiency. If you’re machining deep pockets or shoulders, opt for extended-reach tools with reduced neck diameters to prevent collisions.
4. Evaluate Insert Geometry and Coatings
The geometry and coatings of the inserts significantly impact tool performance. Round inserts are ideal for heavy roughing and tough materials due to their even load distribution, while square inserts are better suited for creating sharp 90° corners. Coatings like TiN are great for general-purpose machining, whereas AlTiN offers high-temperature resistance for aerospace alloys.
5. Account for Machine Capabilities
Your machine’s power and rigidity also dictate tool selection. For low-power machines, use high-feed mills to reduce cutting forces and prevent stalling. For high-rigidity machines, leverage large-diameter cutters for maximum material removal rates. If you’re using CNC automation, prioritize tools with quick-change insert systems to minimize downtime.
6. Balance Cost and Tool Life
Cost-effectiveness is another important factor. Indexable inserts with multiple cutting edges reduce the cost per edge, while solid carbide tools offer high precision and low vibration for finishing operations. For expensive tools like PCD or CBN cutters, consider regrinding services to extend their lifespan.
7. Test and Validate
Finally, always run trial cuts to validate your tool selection. Start with conservative speeds and feeds, then gradually increase based on tool wear and chip formation. Monitor for signs of flank wear, chipping, or built-up edge to adjust parameters or coatings as needed.
Pros and Cons of Face Milling
Face milling is a versatile machining process known for its high material removal rates and excellent surface finishes, but it also faces challenges like tool wear and setup complexity. Below are some common benefits and limitations of the face milling process.
Advantages
- High Material Removal Rates: Face milling allows for the rapid removal of large amounts of material, making it ideal for roughing operations.
- Superior Surface Finish: With the right tools and parameters, face milling can achieve smooth, high-quality surface finishes.
- Versatility: It can be used on a wide range of materials, from soft metals like aluminum to hard alloys like titanium.
- Flatness and Accuracy: Face milling ensures excellent flatness and dimensional accuracy, critical for precision components.
- Efficiency: The use of multi-tooth cutters and indexable inserts reduces machining time and tooling costs.
Disadvantages
- Tool Wear: High cutting forces and heat generation can lead to accelerated tool wear, especially in hard materials.
- Vibration and Chatter: Improper setup or tool selection can cause vibrations, affecting surface finish and tool life.
- Cost of Tooling: High-quality face milling cutters and inserts can be expensive, particularly for specialized applications.
- Machine Rigidity Required: Face milling demands stable, rigid machines to handle the cutting forces and prevent deflection.
- Complex Setup: Achieving optimal results often requires precise alignment and parameter adjustments, which can be time-consuming.
Applications of Face Milling
Face milling offers diverse applications across industries, from aerospace and automotive to medical devices and electronics.
- Aerospace Industry: Machining large, flat surfaces on aircraft components like wings, fuselage panels, and engine mounts.
- Automotive Manufacturing: Producing engine blocks, cylinder heads, and transmission cases with high precision and surface quality.
- Mold and Die Making: Creating flat surfaces and intricate contours in molds and dies for plastic injection or metal casting.
- General Machining: Manufacturing machine frames, base plates, and other large, flat components in industrial equipment.
- Energy Sector: Machining turbine blades, casings, and other critical components in power generation systems.
- Medical Devices: Producing flat, smooth surfaces on surgical instruments and implant components.
- Electronics: Machining enclosures, heat sinks, and other precision parts for electronic devices.
Face Milling vs. Other Milling Processes
Each method has unique characteristics and applications, making them suitable for different machining needs. Below, we explore how face milling differs from these processes and when to use each one.
Face Milling vs. Side Milling
- Face Milling: Primarily uses the face of the cutter to create flat surfaces, focusing on surface finish and material removal rates.
- Side Milling: Uses the sides of the cutter to machine vertical surfaces, slots, or grooves. It is ideal for creating precise edges and profiles.
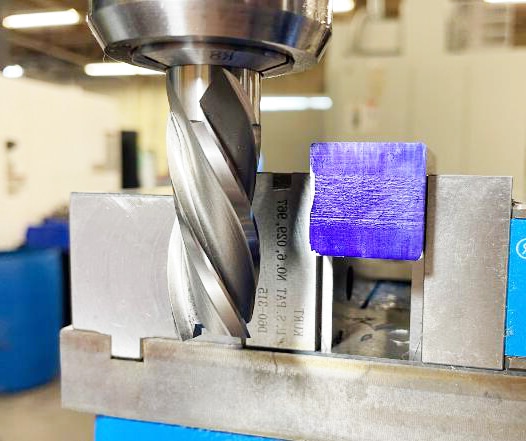
- Key Difference: Face milling is better for flat surfaces, while side milling excels at vertical or angled features.
Face Milling vs. End Milling
- Face Milling: Focuses on large, flat surfaces and is typically performed with larger-diameter cutters.
- End Milling: Uses the end and sides of the cutter for detailed work like slotting, profiling, or contouring. It is more versatile for complex geometries.
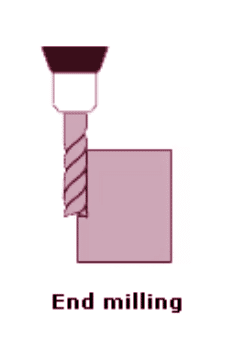
- Key Difference: Face milling is optimized for flat surfaces, whereas end milling is better for intricate shapes and smaller workpieces.
Face Milling vs. Plain Milling
- Face Milling: Uses a cutter with multiple teeth to machine flat surfaces, often achieving better surface finishes.
- Plain Milling (Slab Milling): Uses a cylindrical cutter to remove material from the workpiece surface, typically for roughing operations.
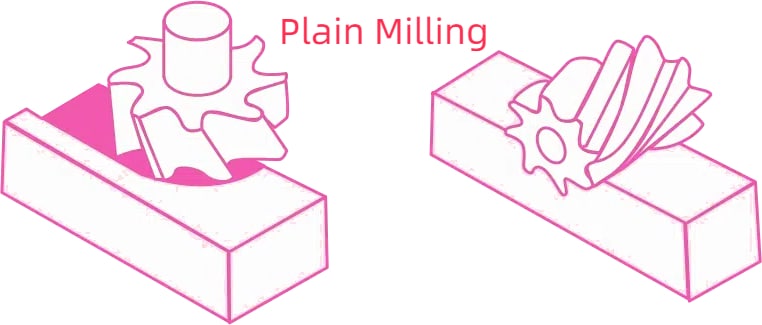
- Key Difference: Face milling is more precise and efficient for finishing, while plain milling is better for heavy material removal in roughing.
Face Milling vs. Peripheral Milling
- Face Milling: Uses the face of the cutter to machine flat surfaces, focusing on surface quality and efficiency.
- Peripheral Milling: Uses the cutter’s periphery to machine the edges or contours of a workpiece, often for detailed profiling.
- Key Difference: Face milling is ideal for flat surfaces, while peripheral milling is better for edge finishing and contouring.
| Process | Primary Use | Tool Focus | Best For | Key Advantage |
| Face Milling | Flat surfaces, finishing | Face of the cutter | Large, flat areas | High material removal, superior finish |
| Side Milling | Vertical surfaces, slots, grooves | Sides of the cutter | Precise edges, profiles | Accurate vertical machining |
| End Milling | Slotting, profiling, contouring | End and sides of the cutter | Complex geometries, small workpieces | Versatility for detailed work |
| Plain Milling | Roughing, heavy material removal | Cylindrical cutter | Large-scale material removal | High efficiency for roughing |
| Peripheral Milling | Edge finishing, contouring | Periphery of the cutter | Detailed profiling, edge finishing | Precision for contours and edges |
Conclusion
In summary, face milling offers the ability to achieve precise flat surfaces and complex geometries. From selecting the right cutters and coatings to understanding the nuances of speeds, feeds, and material-specific operations, this guide has covered essential strategies to maximize efficiency and quality. By comparing face milling with processes like end milling, plain milling, and peripheral milling, we’ve highlighted its unique advantages and limitations.
CNC Milling Services at Ancastings Precision
At Ancastings Precision, our CNC milling services are designed to deliver precision, efficiency, and versatility for your most demanding machining needs. We offer comprehensive face milling services, including conventional face milling for flat surfaces, high-efficiency milling for rapid material removal, and finish milling for superior surface quality. We also specialize in advanced operations like contour milling and pocket milling, ensuring exceptional results for industries such as aerospace, automotive, and medical devices. Whether you need prototyping or high-volume production, our commitment to quality and precision ensures your project’s success. Please feel free to contact our engineer or ask for an instant quote.
FAQs
End milling uses the end and sides of the cutter for detailed work like slotting and profiling, while face milling uses the face of the cutter to create flat surfaces.
Face milling focuses on flat surfaces using the cutter’s face, while peripheral milling uses the cutter’s periphery to machine edges or contours.
Facing is a milling operation where the cutter creates a flat surface on the workpiece, typically using a face mill.
Disadvantages include tool wear, vibration, high tooling costs, and the need for rigid machine setups.
The depth of cut depends on the tool and material, but typically ranges from 0.5 mm to 5 mm for roughing and less for finishing.
A fly cutter has a single cutting edge and is used for light-duty facing, while a face mill has multiple inserts for higher efficiency and better surface finishes.