
You might’ve noticed a sharp or rough edge on a freshly machined part. That edge is called a burr. Burrs may seem minor but they can create big issues for assembly, part performance & overall cost. In this blog post you will learn what burrs are, how to prevent them and which removal methods work best.
What is a Burr?
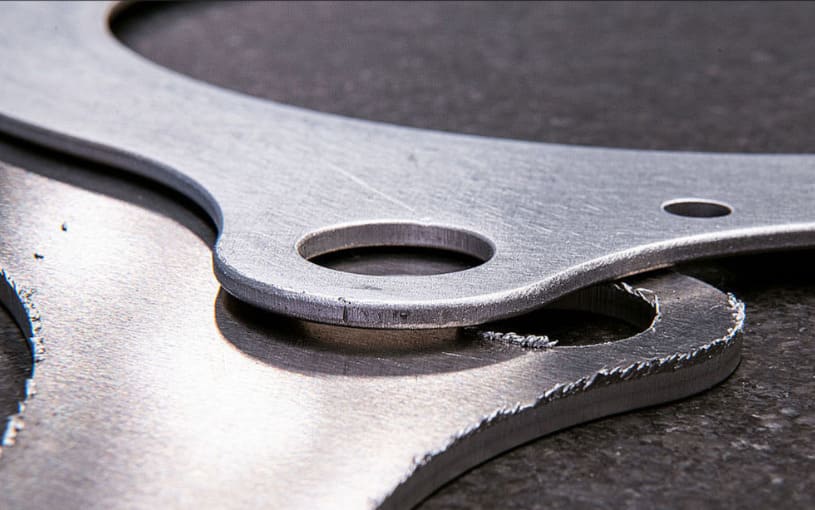
A burr forms when extra material sticks out from a machined edge. You can often spot this sharp ridge after drilling, milling or cutting metal. Burrs usually appear at hole entrances and exits, along the edges of slots or on thin walls. If you leave burrs in place, they can make assembly harder, raise friction as well as shorten the fatigue life of parts—particularly near holes.
Helpful Distinctions
Several important terms can help you better understand burrs.
- Macroburrs vs micro burrs: Macro burrs are large enough to be seen easily. Micro burrs, on the other hand, look like a thin, almost invisible film along the edge.
- Edge condition vs surface roughness: Burrs are an edge condition. This is not the same as surface roughness.
- Burrs come from cutting actions. This sets them apart from flash which is extra material left by casting or molding.
How Burrs Affect Parts & Production?
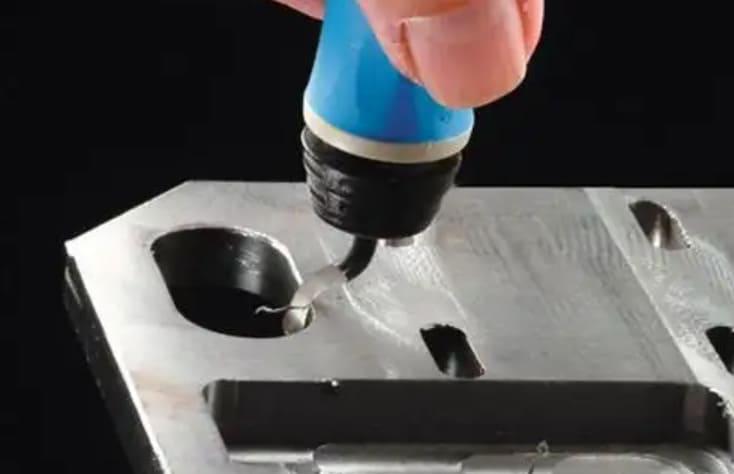
A small burr may seem unimportant but it can cause major problems. Below, we look at how burrs impact both production and part performance.
1. Assembly & Fit
Burrs often stop parts from fitting together as intended. They can cause misalignment and binding during assembly. Moreover fasteners may not seat as they should. For parts with tight tolerances, burrs are responsible for up to 20% of assembly failures. These failures sometimes create confusing “mystery” problems.
2. Performance & Fatigue
Sharp notches from burrs act as stress risers. This is particularly serious near holes where fatigue cracks can start. Additionally burrs can greatly shorten a part’s fatigue life.
3. Finish, Lubrication & Corrosion
Uneven surfaces from burrs interfere with coating and paint adhesion. They also trap moisture and chemicals which speeds up corrosion. Also lubricants cannot form a proper film on rough edges therefore wear happens sooner.
4. Cost & Lead Time
Manual deburring costs between $0.46 and $6.25 per part. This depends on how complex the part is. Deburring can take as long as 15 minutes for each piece. If not planned for, these finishing steps can quietly add 10 to 30% to total production costs.
Choosing a full-service manufacturer like Ancastings can help address deburring early. This reduces hidden costs and keeps your project on track.
5. Safety & Handling
Sharp burrs can cut workers during handling & assembly. Loose burrs may contaminate hydraulic systems, electronics as well as precision assemblies. Similarly in medical devices, even tiny burr particles can cause infection or make a device unusable.
Common Burr Types
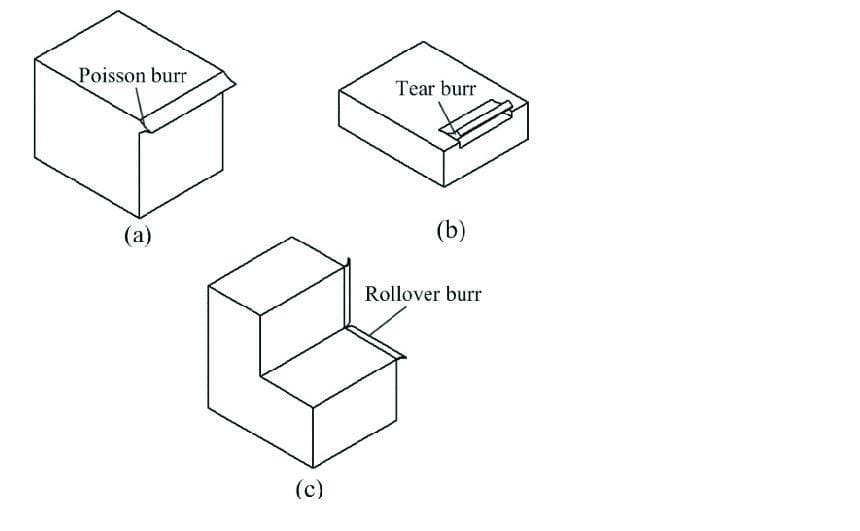
By Mechanism
If you understand burrs formation then it will help predict where they will appear on parts. Four main mechanisms produce different burr types
- Rollover (exit) burr: Sometimes cutting tool exits the workpiece and the material does not shear off cleanly. Instead, it deforms and rolls over the edge which creates this burr.
- Breakout/ cut-off burr: This burr appears when the last bit of material breaks away or fractures before the cut finishes.
- Poisson (lateral-flow) burr: Pressure from the tool pushes the material sideways. The displaced material bulges out at the sides of the cut which forms this burr.
- Tear burr: When the material tears rather than shear, a rough, jagged edge remains. This burr often shows up in punching operations.
By Location & Process (Quick Cues)
You can also identify burrs by where they form and which machining process caused them. Every operation leaves its own marks
- In Drilling: Small, feather-like burrs mostly develop at the hole’s entrance; while larger rollover burrs mostly form at the exit.
- In Milling/ Turning: Burrs tend to appear along the toolpath edges. They are most common at the slot or pass exit where the material is not supported.
- Sawing/ Shearing: These processes mostly create breakout burrs. The workpiece fractures & separates just before the cut completes.
- Thin Sections: Machining thin walls can cause the material to bend instead of staying rigid. The edge may smear into a lip rather than cutting cleanly.
Also See: The Difference between CNC Milling and Turning
How Burrs Form?
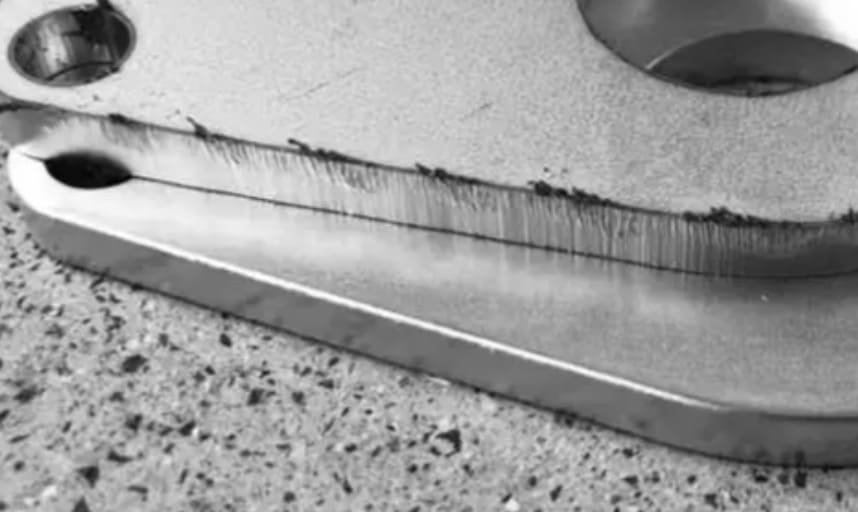
You can control burr formation by understanding its predictable patterns. Knowing these mechanisms lets you adjust process variables early. Therefore finished parts avoid burr-related issues.
1. Formation Paths
Three main routes cause material deformation; chip bending at the edges, lateral extrusion from cutting forces and material tearing when support is lacking. Studies show that these three mechanisms explain almost all burrs created during machining. Each route reacts in its own way to changes in the machining process.
2. Process Factors
Tool sharpness has a major role in burr size. Dull tools can triple burr height compared to sharp ones. Similarly when you double the feed rate, burr height increases from 0.075mm to 0.141mm. Workholding rigidity and coolant flow also change the final burr dimensions.
Also See: Feed Rate and Cutting Speed in CNC Machining
3. Material & Geometry Factors
Type of material matters a lot as well. Soft, ductile alloys such as aluminum tend to smear which leads to larger burrs. On the contrary hard & brittle materials like cast iron normally break cleanly. This makes smaller chips instead of burrs. Part geometry, including thin walls or unsupported edges also has a strong effect on burr size.
4. On Machine Warning Signs
Certain signs during machining point to burr problems. High cutting noise and chatter often mean burrs are developing. Therefore watch for stringy chips that do not clear away or for heat that discolors the workpiece. Similarly raised edges while machining show that burrs are forming and need quick action.
Specifying and Measuring Edges (to Clarify “Deburr”)
Use Standards & Symbols
Industry uses a five-class system to describe burrs by their appearance. This approach helps teams quickly judge edge quality. Engineers rely on the ISO 13715 standard for formal drawings. This standard lets them set exact edge requirements and tolerances and this removes any confusion. According to ISO 13715, burrs fall into five main classes.
| Class | Type of Burr | Visual Appearance |
|---|---|---|
| Class 1 | Micro burrs | Can only be seen with a microscope |
| Class 2 | Small/ Feather burrs | Visible to the naked eye |
| Class 3 | Small burrs | Well-attached burrs on the workpiece |
| Class 4 | Large burrs | Large, well-attached burrs on the workpiece |
| Class 5 | Extended burrs | Plastically deformed material, not a true burr |
What to Capture in Drawings/ POS
POs (purchase orders) and drawings need to include detailed information. Always state the maximum burr height allowed with the help of millimeters or thousands of an inch. Also make sure to mark the exact locations where deburring is needed; because selective deburring keeps costs down and protects important functional edges.
Practical Metrology
Measuring burrs requires attention to both height & root thickness. The root thickness mostly shows how hard it will be to remove the burr. Optical microscopes, laser scanners as well as tactile probes are common tools for this task. To keep results consistent, define clear gauge points and set a sampling plan for every batch.
Buyer-Supplier Alignment
Buyers and suppliers must communicate clearly. Buyers should mark critical edges on drawings and set acceptance rules such as “No burrs > 0.05 mm on sealing ports.” They also need to note when sharp edges are required for function like on blades or seals.
At Ancastings, our engineers work directly with clients to set edge specifications & acceptance rules. This teamwork assures everyone agrees from the design stage through to delivery.
How to Prevent & Minimize Burrs During Machining?
Process Tweaks
- Sharp Tools & Feeds: Always use sharp cutting tools; because dull tools can make burrs up to three times larger. Lower the feed rate only when the tool breaks through the material to help reduce exit burrs. Studies show that raising the feed by 20% can cut down burr thickness by a large margin.
- Toolpath Strategy: Direction of tool rotation affects burr size. Milling in a clockwise direction usually results in smaller burrs as compared to milling counterclockwise. When possible, finish the cut on sacrificial material. Plan tool paths so that critical edges are not used as exit points.
- Workholding Rigidity: Secure fixtures tightly to keep the part from moving. Good stability stops deflection and prevents smearing of material. Keep overhangs short to avoid chatter & uneven burrs.
Tooling & Geometry
- Specialized Cutting Tools: Use drills with modified shapes to lower burr height. Best results come from a 10° chamfer angle and a chamfer length of 2mm. U-drills with carbide inserts control burrs better than solid drills.
- Entry Features: Add chamfers or edge breaks to parts to control the edges. Place backup plates under thin sheets to support them during cutting. Use sacrificial stock at important edges to stop breakout burrs.
DFM & Drawings
- Clear Specifications: Use ISO 13715 symbols instead of unclear “deburr all” notes. Only set maximum burr heights for edges that matter most. Show where sharp edges are needed for the part to work.
- Smart Design Choices: Make features easy to reach so burrs do not hide in deep holes. Call for selective deburring only where it is needed; this can lower manufacturing costs by 30%. Choose part orientation so that burrs do not form on important surfaces.
Deburring Methods (from Simple to Specialized)
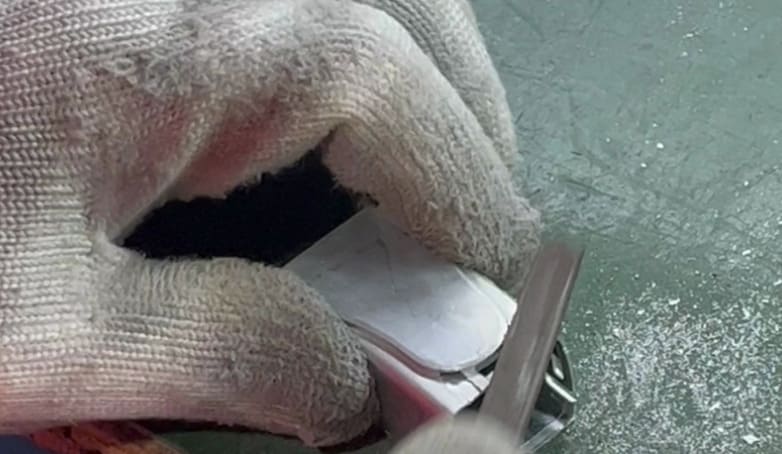
When it is not possible to prevent burrs then choice of right deburring method can help save both time and money. The best method depends on factors like part complexity, material type and how many parts need processing.
Manual & Mechanical Finishing
Manual deburring uses tools such as files, countersinks, scrapers as well as abrasive brushes to remove burrs from edges and holes.
On the other hand mechanical machines, including tumblers and rotary brushes, work well for processing batches of parts.
Most manual tools can smooth burrs that are smaller than 0.1 mm. In contrast mechanical machines work better for tougher edges.
Blasting & Water-Based
Blasting methods use abrasive media or high pressure water jets to clear burrs from surfaces and edges. High pressure water jet deburring uses a powerful water stream to remove burrs and clean inside passages. This method is common in automotive & hydraulic applications.
Advanced/ Automated Processes
- Abrasive Flow Machining (AFM): In AFM, abrasive putty moves through internal passages under pressures of 200 to 800 PSI. This process removes hidden burrs from complicated shapes.
- Electrochemical Deburring (ECD): ECD uses electrolytic action at voltages between 5 and 25 volts to dissolve burrs. It works well for conductive edges that are hard to reach.
- Cryogenic Deburring: This method cools parts to -195°F which makes burrs brittle. Tumbling with plastic media then removes the brittle burrs.
Electropolishing & Chemical
Electropolishing works well for stainless steel and other conductive alloys. It removes microburrs at a microscopic scale and also improves the part’s surface finish. Chemical deburring uses particular acid solutions to dissolve burrs. This non-contact method is gentle and protects delicate parts.
How to Choose a Deburring Method (Quick Decision Aid)
Choosing the right deburring method is essential for maintaining quality and managing expenses. Review these key factors
- Part features: Tumbling or brushing works well for simple, open edges. For complicated internal passages, methods like AFM, ECD or TEM provide better results.
- Material: The material type matters. Cryogenic deburring suits plastics best. While ECD works only with conductive metals.
- Safety & environment: Check your shop’s capabilities. Chemical & electrochemical processes need handling electrolytes. Blasting methods, on the other hand, create dust that needs proper control.
If you are unsure which method fits your part, Ancastings’ experts can suggest the ideal solution based on your material, geometry and production needs.
To Sum Up
Burrs can affect part assembly, quality and safety if not managed early. By learning about burr types, how they form along with their removal techniques, you can produce smoother, more dependable components and avoid extra costs. For precise, burr‐free machining and finishing, trust Ancastings’ CNC services to meet your project’s quality standards. You can contact us anytime.
Total burr elimination is not possible but you can reduce burrs to 0.002-0.005″ by using special drill shapes, adjusting exit angles & controlling cutting parameters.
For holes under 1mm, electrochemical deburring (ECD) gives the best results. Abrasive flow machining and micro‐deburring tools with fine control are also effective.
Yes. Many CNC machines support automatic deburring cycles. You can also use engraving, contouring or dedicated toolpaths to deburr edges automatically.